
Marketo
Connect Marketo to JustAI to serve AI-optimized copy (subject, preheader, CTA, and more) in your existing email campaigns. Marketo can’t fetch remote content at send time, so instead a webhook inside a triggered Smart Campaign writes JustAI’s copy into custom fields on each person’s record right before the send, and the email renders those fields.
How it works
Section titled “How it works”- A triggered Smart Campaign calls the JustAI webhook for each person before the email is sent.
- JustAI returns the best copy for that person — subject, preheader, CTA, and any other variables you’ve set up.
- Marketo writes the returned values into custom fields on the person’s record.
- The email renders those fields with
{{lead.jw_*}}tokens; a:default=fallback in each token keeps the message safe if a value is missing.
Before you start
Section titled “Before you start”- Your JustAI org slug — usually your company name in lowercase (ask us if you’re not sure).
- A JustAI API key — create one in the JustAI Console.
- Marketo admin access to create custom fields and webhooks.
Connect Marketo to JustAI
Section titled “Connect Marketo to JustAI”This setup is one-time. Once the fields and webhook exist, you can reuse them for any message.
Step 1 — Create custom fields
Section titled “Step 1 — Create custom fields”Create one custom field for every variable you plan to fill from JustAI. Add new fields in Admin → Field Management → New Custom Field. Keep naming consistent (jw_ prefix). These fields must exist before you can map webhook responses to them.
| Example Field Label | API Name (SOAP) | Type |
|---|---|---|
| JW Subject | jw_subject | String |
| JW Preheader | jw_preheader | String |
| JW CTA | jw_cta | String |
Step 2 — Configure the JustAI webhook
Section titled “Step 2 — Configure the JustAI webhook”Create a new custom webhook that calls the JustAI API. This can be reused on any new message.
- Webhook Name:
JustAI Webhook - Request Type:
GET - URL:
https://worker.justwords.ai/api/generate/<org_slug>?template_id={{campaign.id}}&tracking_id={{lead.id}}-{{campaign.id}}-{{system.dateTime}}&user_id={{lead.id}}- Headers:
X-Api-Key: <JUSTAI_API_KEY>Content-Type: application/json-
Response Type: JSON
-
Response Mappings:
| Response Attribute | Marketo Field |
|---|---|
copy.vars.subject | lead.jw_subject |
copy.vars.preheader | lead.jw_preheader |
copy.vars.cta | lead.jw_cta |
When the webhook fires, JustAI returns a JSON response such as:
{ "copy": { "id": "abc123", "vars": { "subject": "Fall Sale Starts Now", "preheader": "Shop early and save 20%", "cta": "Start Shopping" } }}Set up a campaign
Section titled “Set up a campaign”Do this for every message you want JustAI to optimize.
Step 1 — Build a dynamic email template
Section titled “Step 1 — Build a dynamic email template”Replace any static text with the new field tokens.
Example subject line:
{{lead.jw_subject:default=Fall Sale Starts Now}}Example preheader:
{{lead.jw_preheader:default=Shop early and save 20%}}Example CTA:
<a href="https://yourstore.com">{{lead.jw_cta:default=Shop Now}}</a>These tokens pull the webhook-enriched values at send time. If any are missing, the :default= fallback ensures a safe baseline message.
Step 2 — Create a triggered Smart Campaign
Section titled “Step 2 — Create a triggered Smart Campaign”Set up a triggered campaign (or update an existing one) with the following flow steps:
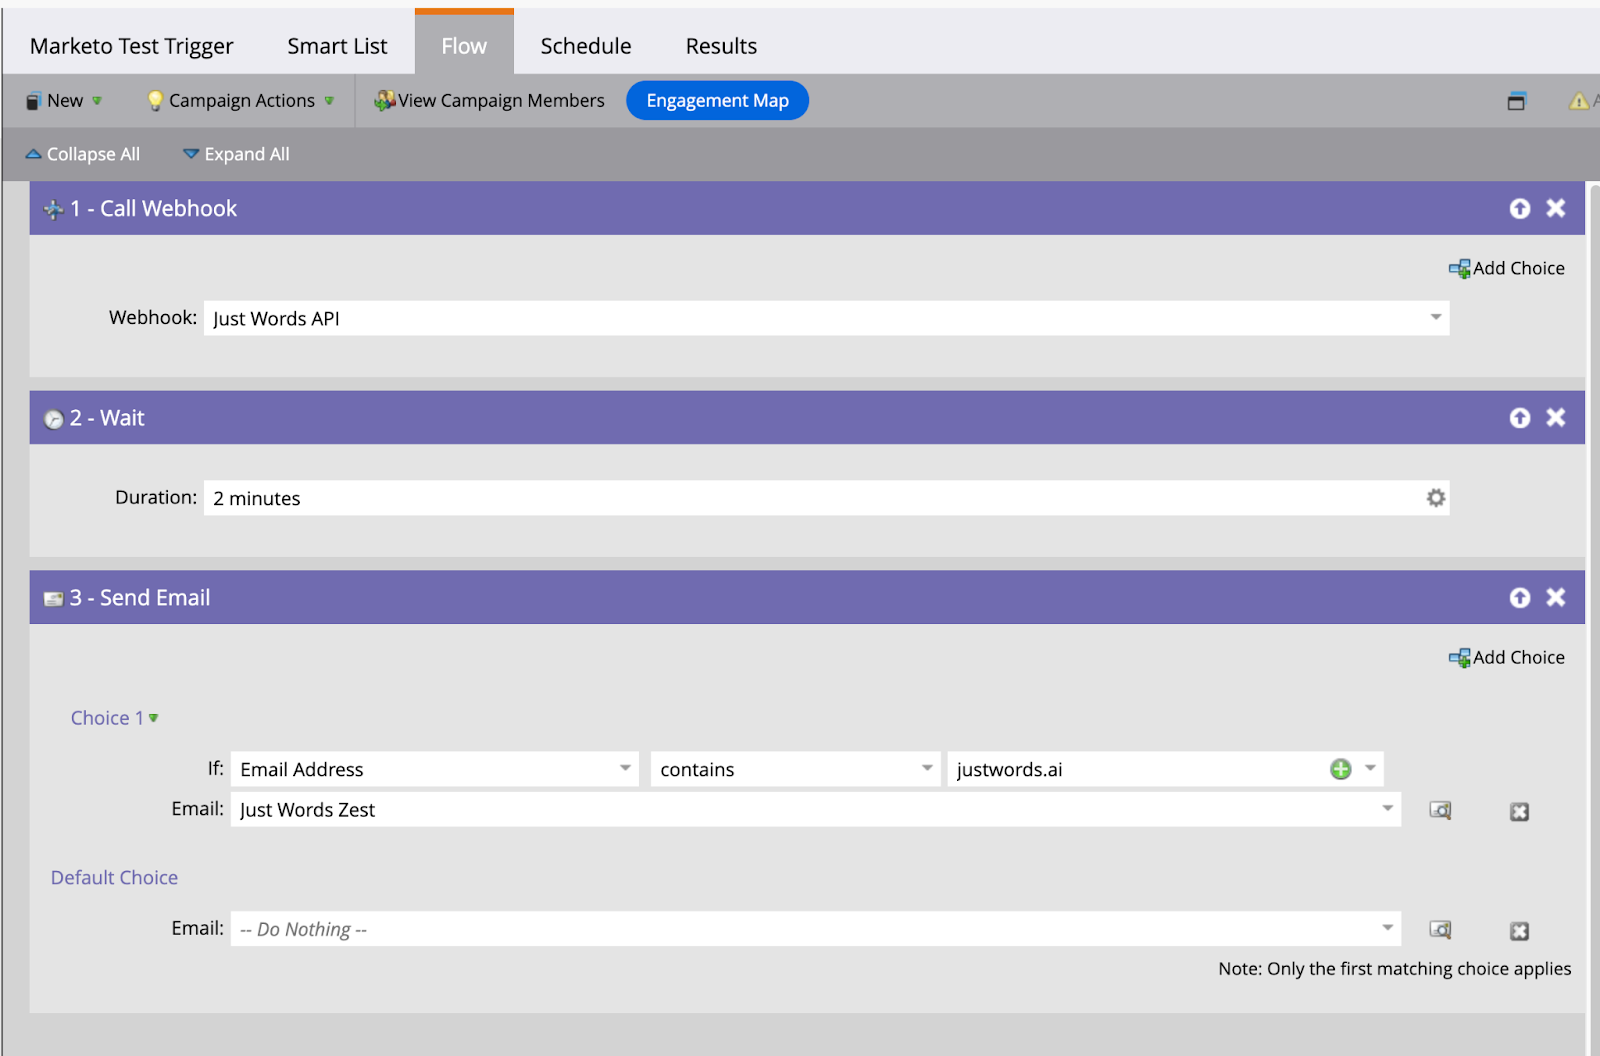
- Call Webhook:
JustAI Generate - Wait: 1–2 minutes (to allow the webhook to run and the fields to update)
- Send Email: your dynamic email using
{{lead.jw_*}}tokens
A triggered campaign is required — webhooks only run in triggered campaigns, not in batch or scheduled runs.
If your campaign is batch/scheduled
Section titled “If your campaign is batch/scheduled”If your campaign is set up as a batch (scheduled) campaign, refactor your setup into two linked campaigns:
-
Batch Campaign (Qualifier):
- Keep all your existing Smart List filters here (e.g., audience, segmentation, etc.).
- Inside the flow, replace the Send Email step with Request Campaign pointing at the triggered campaign above.
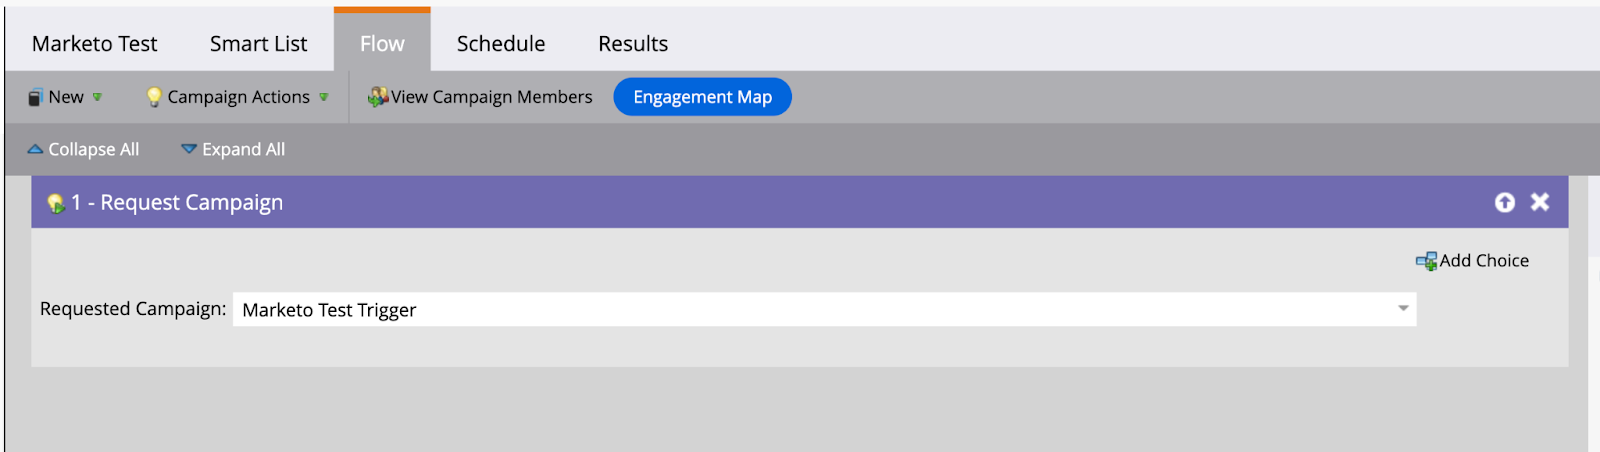
-
Triggered Campaign (Executor):
- Keep all your existing Smart List filters here (e.g., audience, segmentation, etc.).
- Inside the flow, replace the Send Email step with Request Campaign pointing at the triggered campaign above.
Troubleshooting
Section titled “Troubleshooting”- The webhook never fires → Webhooks only run in triggered campaigns, not in batch or scheduled runs. If your campaign is batch/scheduled, use the two-campaign setup above.
- You can’t map a response attribute to a field → The custom field must exist before you can map a webhook response to it. Create it in Admin → Field Management → New Custom Field.
- Emails send the
:default=fallback copy → Make sure the flow includes a Wait step of 1–2 minutes between the webhook call and the send, so the fields have time to update.