
Klaviyo
Connect Klaviyo to JustAI so JustAI can generate optimized email content, write it back to each recipient’s profile, and (once egress is set up) learn from sends, opens, and clicks over time.
How It Works
Section titled “How It Works”JustAI plugs into a Klaviyo Flow. A Webhook step calls JustAI, which generates the best-performing content for that recipient. After a short time delay, the email step renders that content. If JustAI hasn’t run yet (or fails), the email automatically falls back to your control content, so it never sends blank.
This is a one-time connection per Klaviyo account, plus a quick per-template setup in the JustAI console.
Before You Start
Section titled “Before You Start”- Identify your JustAI org slug (usually your company name in all lower case — ask us if unsure).
- Make sure you have permission to create API keys and edit Flows in Klaviyo.
- Decide which existing email you want to test against. You’ll clone it to create the treatment email so it keeps the same sender and design.
Step 1 — Create a Klaviyo API Key
Section titled “Step 1 — Create a Klaviyo API Key”In Klaviyo, go to Settings → API Keys → Create Private API Key:
- Name it
JustAI. - Give it Full Access. JustAI reads your flows, campaigns, and metrics, writes generated content back to profiles, and manages the treatment email template, so a full-access key keeps setup simple.
- Copy the private key.
Step 2 — Connect Klaviyo in JustAI
Section titled “Step 2 — Connect Klaviyo in JustAI”- Open Org Integration Settings in the JustAI console.
- Select Klaviyo, paste the private API key, and click Verify, then save.
- Generate a JustAI API key and store it securely — you’ll use it in the Klaviyo webhook in Step 4.
Step 3 — Build Your Klaviyo Flow
Section titled “Step 3 — Build Your Klaviyo Flow”An A/B test compares JustAI-generated content (treatment) against your existing content (control). Pick whichever layout fits how you work:
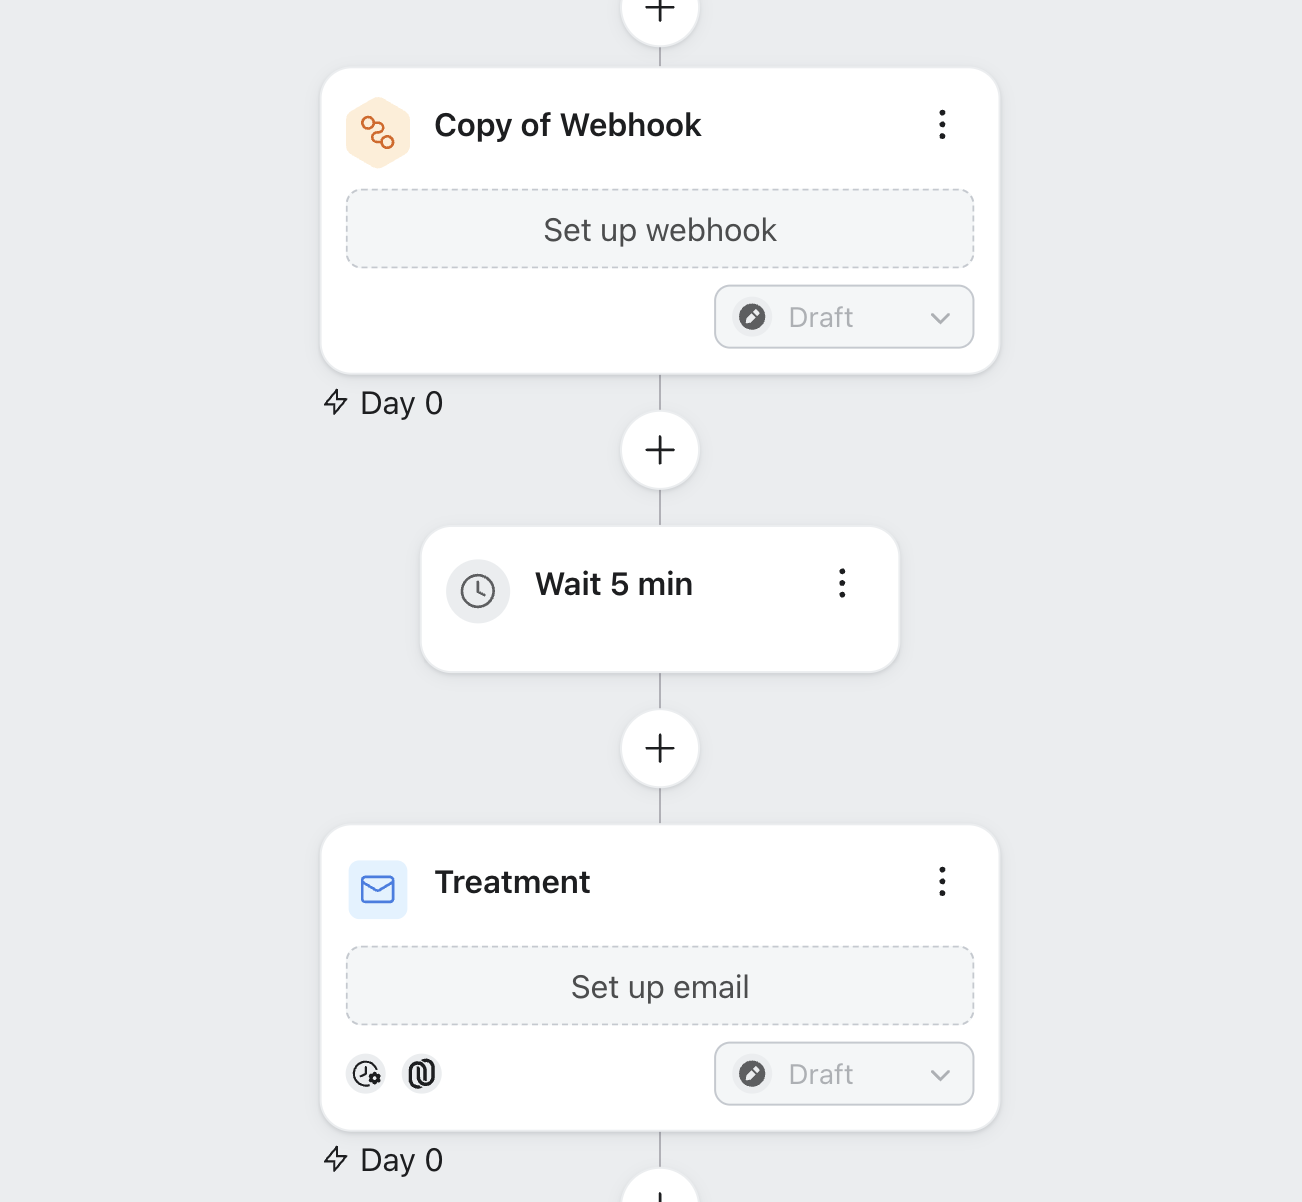
Option A — JustAI runs the split (single path)
Section titled “Option A — JustAI runs the split (single path)”Keep one email step. Insert the JustAI webhook right before it, followed by a time delay. JustAI decides per recipient whether to serve a treatment or control variant, so the flow stays a single path. In JustAI, leave the A/B split set to internal and map only the Treatment Message.
Your flow should include:
- A trigger (e.g. “Added to List”, a metric, or segment entry).
- A webhook step that calls JustAI (configured in Step 4).
- A time delay right after the webhook.
- An email step — clone your control email to create the treatment, then map it as the Treatment Message in JustAI. JustAI wires its content in Step 5.
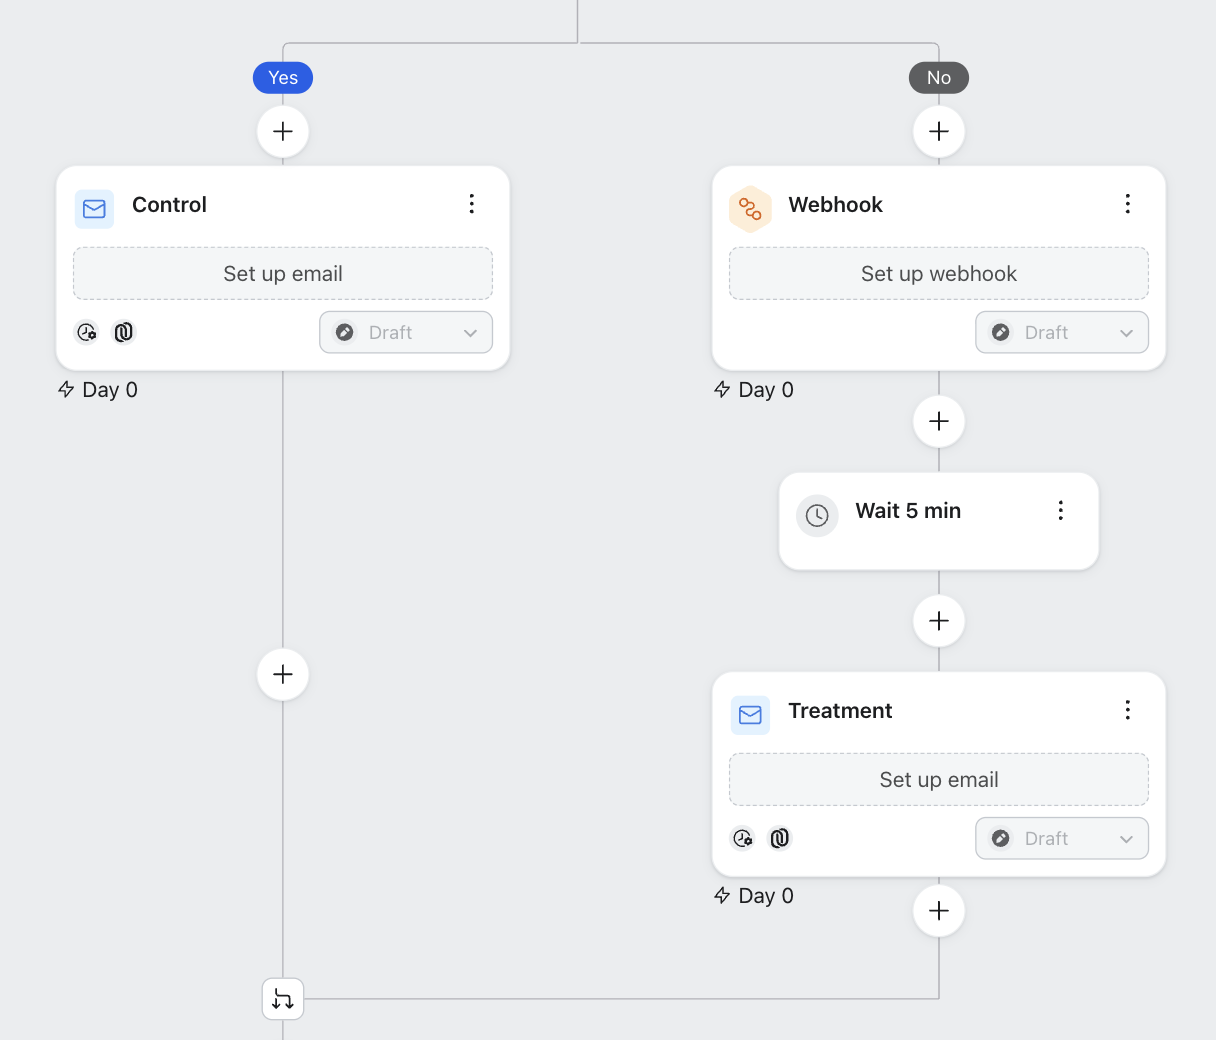
Option B — Klaviyo runs the split (separate branches)
Section titled “Option B — Klaviyo runs the split (separate branches)”Use a Conditional or Random Split to route recipients down two branches:
- Control branch: your existing email (no webhook).
- Treatment branch: webhook → time delay → treatment email (a clone of your control email).
In JustAI, set the A/B split to external and map both the Treatment Message and the Control Message.
Step 4 — Configure the Webhook
Section titled “Step 4 — Configure the Webhook”In the webhook step:
- Method:
POST - Destination URL:
https://worker.justwords.ai/api/generate/<org_slug> - Headers:
X-Api-Key: <JUSTAI_API_KEY>(the JustAI key from Step 2)Content-Type: application/json
- JSON Body:
{ "template_id": "<template_id>", "user_id": "{{ person.KlaviyoID }}", "tracking_id": "{{ person.KlaviyoID }}.<flow_id>.<treatment_message_id>", "fields": { "first_name": "{{ person.first_name }}" }}Step 5 — Map the Flow and Wire the Treatment Email
Section titled “Step 5 — Map the Flow and Wire the Treatment Email”In the JustAI console, open the template’s Integration Settings:
- Select the Flow (synced from your Klaviyo account).
- Select the Treatment Message — the email step that renders JustAI content. For an external split (Option B), also select the Control Message.
- Click Save Changes.
- Click Sync to Klaviyo.
Sync to Klaviyo does the wiring for you: it sets the treatment email’s subject line, preview text, and body to pull from the JustAI-generated profile properties, with an automatic fallback to your control content so the email never sends empty.
Manual setup (optional)
Section titled “Manual setup (optional)”If you’d rather wire the email yourself instead of using Sync to Klaviyo, open the treatment email in Klaviyo and set these values. Replace <template_id> with your JustAI template ID (the JustAI setup page shows the exact strings to copy):
| Field | Klaviyo value |
|---|---|
| Subject Line | {{ person|lookup:'jai_<template_id>_subject'|default:"Your weekly update" }} |
| Preview Text | {{ person|lookup:'jai_<template_id>_preheader'|default:"" }} |
| Body (HTML) | {{ person|lookup:'jai_<template_id>_body'|safe }} |
Each property is namespaced by template ID so multiple JustAI flows can target the same profile without clobbering each other. The |default: filters provide fallback text and the |safe filter renders raw HTML.
Personalization
Section titled “Personalization”JustAI generates content server-side and supports two ways to pass per-recipient data in the webhook body.
Use fields for values that should be inserted into the generated copy (rendered server-side before write-back). This is what JustAI’s setup page adds to the webhook body automatically:
{ "template_id": "<template_id>", "user_id": "{{ person.KlaviyoID }}", "tracking_id": "{{ person.KlaviyoID }}.<flow_id>.<treatment_message_id>", "fields": { "first_name": "{{ person.first_name }}" }}Use attrs for values that should influence which variant a recipient gets (ranking and selection), without being inserted into the copy:
{ "template_id": "<template_id>", "user_id": "{{ person.KlaviyoID }}", "tracking_id": "{{ person.KlaviyoID }}.<flow_id>.<treatment_message_id>", "attrs": { "persona": "{{ person|lookup:'persona' }}", "plan": "{{ person|lookup:'plan_type' }}" }}You can combine fields and attrs in the same request.
Supported Personalization Syntax
Section titled “Supported Personalization Syntax”JustAI renders your content with a server-side Django template engine before writing it to Klaviyo. The following syntax is supported in your JustAI content. Anything outside this list — including Klaviyo’s own tags like {% web_view %} or {% unsubscribe %} — is passed through untouched so Klaviyo can resolve it at send time.
Tags
{% if %}/{% elif %}/{% else %}/{% endif %}— conditions support==,!=,and,or,not, and plain truthiness (no</>).{% for x in items %}/{% endfor %}— loop over a list;forloop.counter,forloop.first, andforloop.lastare available.{% comment %}…{% endcomment %}and{# … #}— comments (removed from output).
Filters
| Filter | What it does |
|---|---|
lookup:'name' | Read a Klaviyo profile or event property |
default:'x' | Fallback when the value is empty |
default_if_none:'x' | Fallback only when the value is missing/null |
upper / lower / title / capfirst | Change casing |
truncatechars:n / truncatewords:n | Shorten text (adds …) |
striptags | Remove HTML tags |
escape / escape_once | HTML-escape the value |
linebreaksbr | Convert newlines to <br> |
replace:'a','b' | Replace text |
urlencode | URL-encode the value |
floatformat:n | Format a number to n decimal places |
safe | Mark HTML as safe to render |
Liquid-style aliases also work: upcase, downcase, capitalize, truncate, strip_html.
Troubleshooting
Section titled “Troubleshooting”- Webhook not firing: Confirm the Flow is live (not in draft) and the webhook step is active.
- Email renders empty or stale: Increase the time delay to 5 minutes, and confirm the Klaviyo API key has Profiles: Write scope.
- Wrong profile ID: Make sure the webhook uses
{{ person.KlaviyoID }}, not{{ person.id }}. - Flows or messages not showing in JustAI: Click Refresh Klaviyo Data. If they still don’t appear, verify the API key has Flows: Read and Campaigns: Read scopes.
- Klaviyo tags showing as literal text in the email: Move
{% unsubscribe %},{% web_view %}, and similar tags out of the JustAI body and into the surrounding Klaviyo email layout.
JustAI can share data about which content each user received for Klaviyo-integrated campaigns. The standard approach is a daily data export to a shared S3 bucket.
Example Data Payload
Section titled “Example Data Payload”Each record reflects one JustAI API call with a user ID and tracking ID that maps back to a Klaviyo flow execution.
{ "event_timestamp": "<unix_timestamp>", "user_id": "<string>", "tracking_id": "<string>", "copy_id": "<uuid_string>", "template_id": "<string>", "vars": { "subject": "<string>", "preheader": "<string>", "body": "<string>" }, "attrs": { "persona": "<string>" }}Implementation
Section titled “Implementation”- JustAI provisions an ARN role with read/write access to the shared bucket.
- Client creates the bucket (or path) and grants access to the role.
- JustAI runs a backfill and sets up daily exports.
- Client transfers data from S3 into their data warehouse.
Implementation Details
Section titled “Implementation Details”- Exported data is in Parquet format, written to a partitioned path (
.../YYYY/MM/DD/HH). - Backfills overwrite existing data for the time range.
- Retention is managed via bucket lifecycle policies.
Please reach out to our team to set up data egress for your Klaviyo integration.