Create Variants
Variants let you personalize the same touchpoint for different audiences while tracking performance. Use them to A/B test creative, tailor messaging to attributes, or keep a control copy alongside experiment arms.
Before you start
Section titled “Before you start”- Make sure your template has the right variables, fields, attributes, and themes in place. You can set these during the setup process.
- Confirm your experimentation method (internal split is recommended) in the template’s Configure → Integration tab.
1) Create a new variant
Section titled “1) Create a new variant”- Open the template you want to experiment on and go to Studio
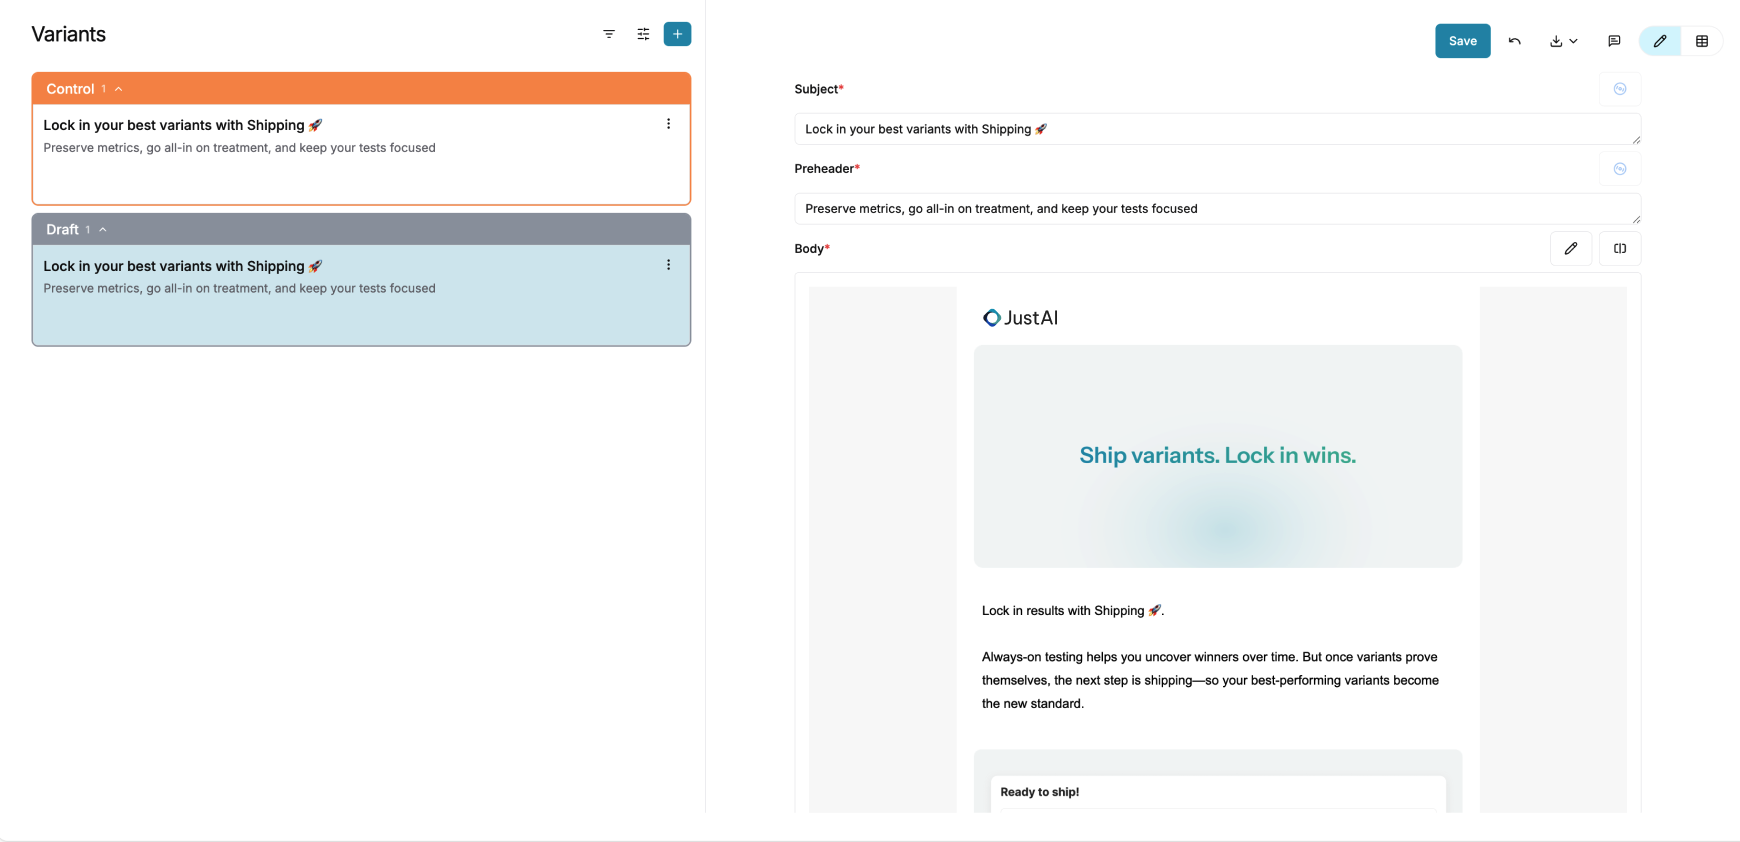
- In the Variants component, you’ll see the control copy that was pulled directly from your ESP.
- In the top-right corner of the Variants component, click the + button to start creating variants.
Control serves as the baseline. All variants will be generated relative to it + org-level settings (brand, tone, copy rules).
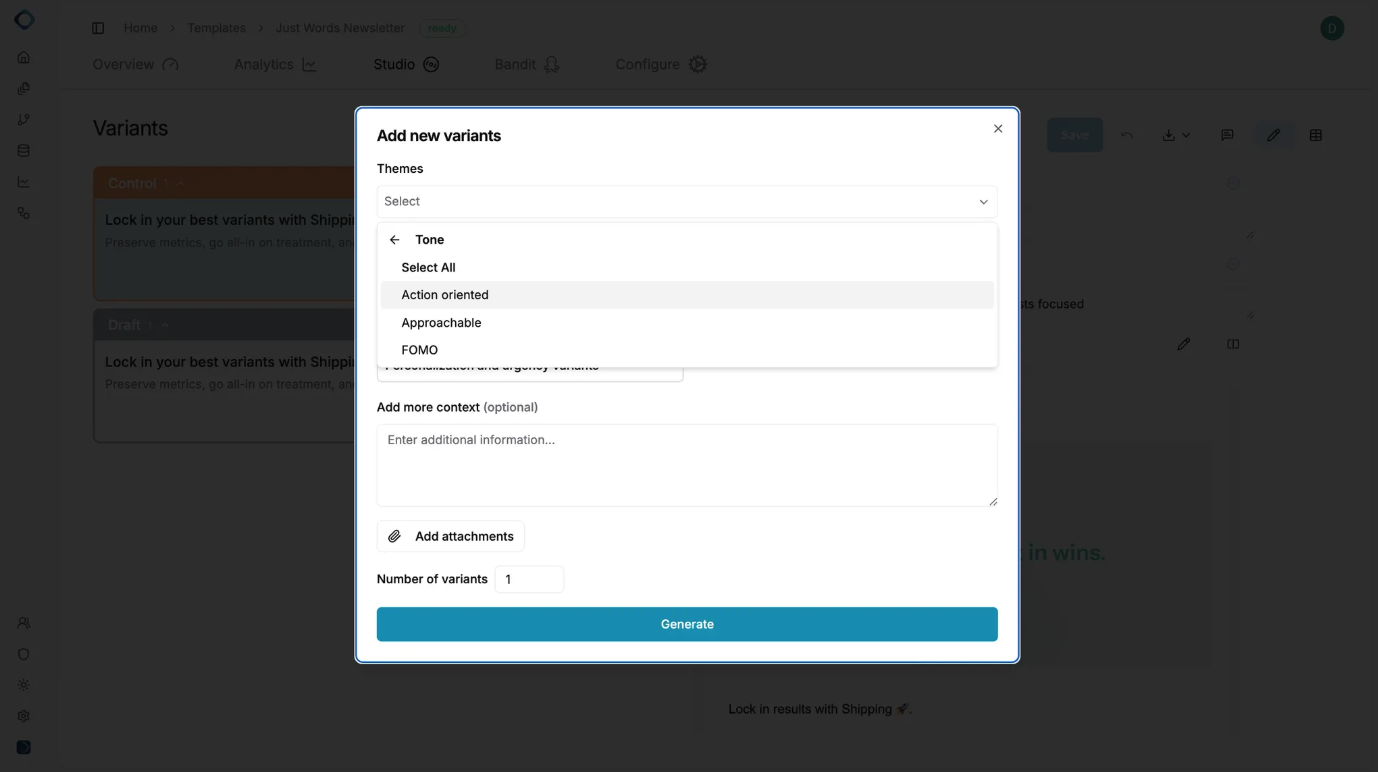
2) Configure variant creation
Section titled “2) Configure variant creation”After clicking +, a creation modal will open. This step defines how JustAI should generate variants using existing configuration from your org and template.
Variant Inputs
Section titled “Variant Inputs”In this modal, you can select and apply the following inputs:
-
Themes
Preconfigured messaging directions that already exist in your template setup. Themes help guide how variants differ in tone, framing, or intent (e.g. urgency, friendliness, persuasion).
-
Attributes
Existing segmentation dimensions used to group or target variants (e.g. subscription tier, lifecycle stage). These attributes determine how variants are organized and evaluated.
-
Fields
Predefined templated values that may appear directly in copy (e.g.
{{ firstName }},{{ planName }}). -
Additional Context
An optional input where you can add extra guidance, constraints, or context to inform how variants should be written (e.g. “Keep subject lines under 40 characters”).
In the creation modal, you can select one or more of these inputs to apply to variant generation. Once done, continue to generate variants.
3) Generate variants in chat
Section titled “3) Generate variants in chat”After submitting the modal, a chat experience opens on the right side of the screen.
In the chat, you can:
Section titled “In the chat, you can:”- Compare variants
- Edit variants using natural language (e.g. “Make this more concise” or “Increase urgency”)
- Approve variants directly
- Generate additional variants by adding more instructions or themes
This makes it easy to iterate quickly without leaving the workflow.
4) Review variants
Section titled “4) Review variants”Once variants are created and approved:
- They appear on the left side of the screen in the Variants list.
- Variants are grouped automatically based on:
- Shared themes
- Shared attributes
- This grouping helps you clearly understand how variants relate to each other and how they’ll be evaluated in experiments.
At this point, your variants are ready to be used in experimentation and traffic splitting.
5) Editing variants
Section titled “5) Editing variants”Editing option 1: Remixing (AI-assisted edits)
Section titled “Editing option 1: Remixing (AI-assisted edits)”Remixing allows you to quickly update specific parts of a variant using AI prompts, while preserving the rest of the content.
How to Remix
Section titled “How to Remix”You can remix a variant in two ways:
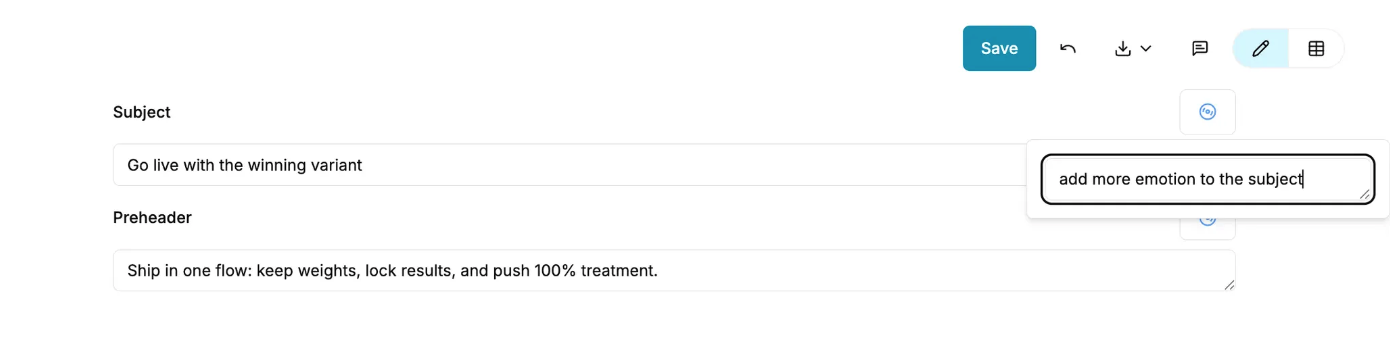
- From the email preview
- Open the variant you want to edit.
- In the email preview, click the Remix button.
- Enter a prompt describing the change you want (e.g. “Make this more urgent” or “Shorten the CTA copy”).
- From a specific HTML section
- Right-click the specific section of the email body you want to edit.
- Select Remix.
- Add a prompt describing how that section should change.
This approach is ideal when you want targeted AI edits without regenerating the entire variant.
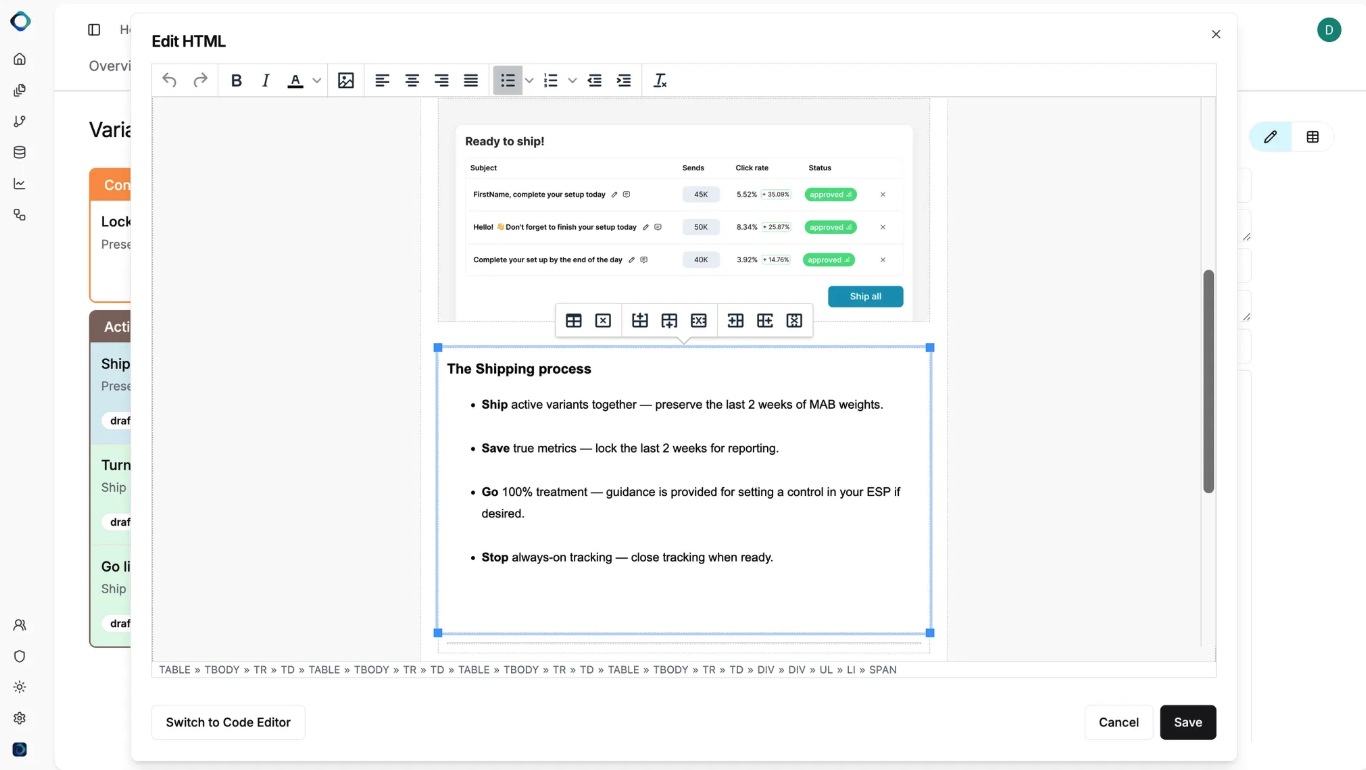
Editing option 2: Visual editor (Manual edits)
Section titled “Editing option 2: Visual editor (Manual edits)”The Visual Editor is recommended when you want full manual control over the content and layout.
How to use the Visual Editor
Section titled “How to use the Visual Editor”- Open the variant you want to edit.
- In the top-right corner of the Body component, click the pencil icon.
- You’ll be taken to the Visual Editor, where you can:
- Edit copy directly in each section of the email body
- Make precise, manual changes without AI intervention
This option is best for final polish, compliance edits, or exact wording changes.
Editing option 3: Open in chat
Section titled “Editing option 3: Open in chat”This option allows you to edit variants conversationally using natural language.
How to edit in chat
Section titled “How to edit in chat”- Locate the variant you want to edit.
- Click the three-dot (⋯) menu on the variant.
- Select Open in Chat.
- Enter your prompt directly in the chat (e.g. “Rewrite this with a friendlier tone” or “Create an alternative CTA”).
This method is ideal for exploratory editing and rapid iteration.
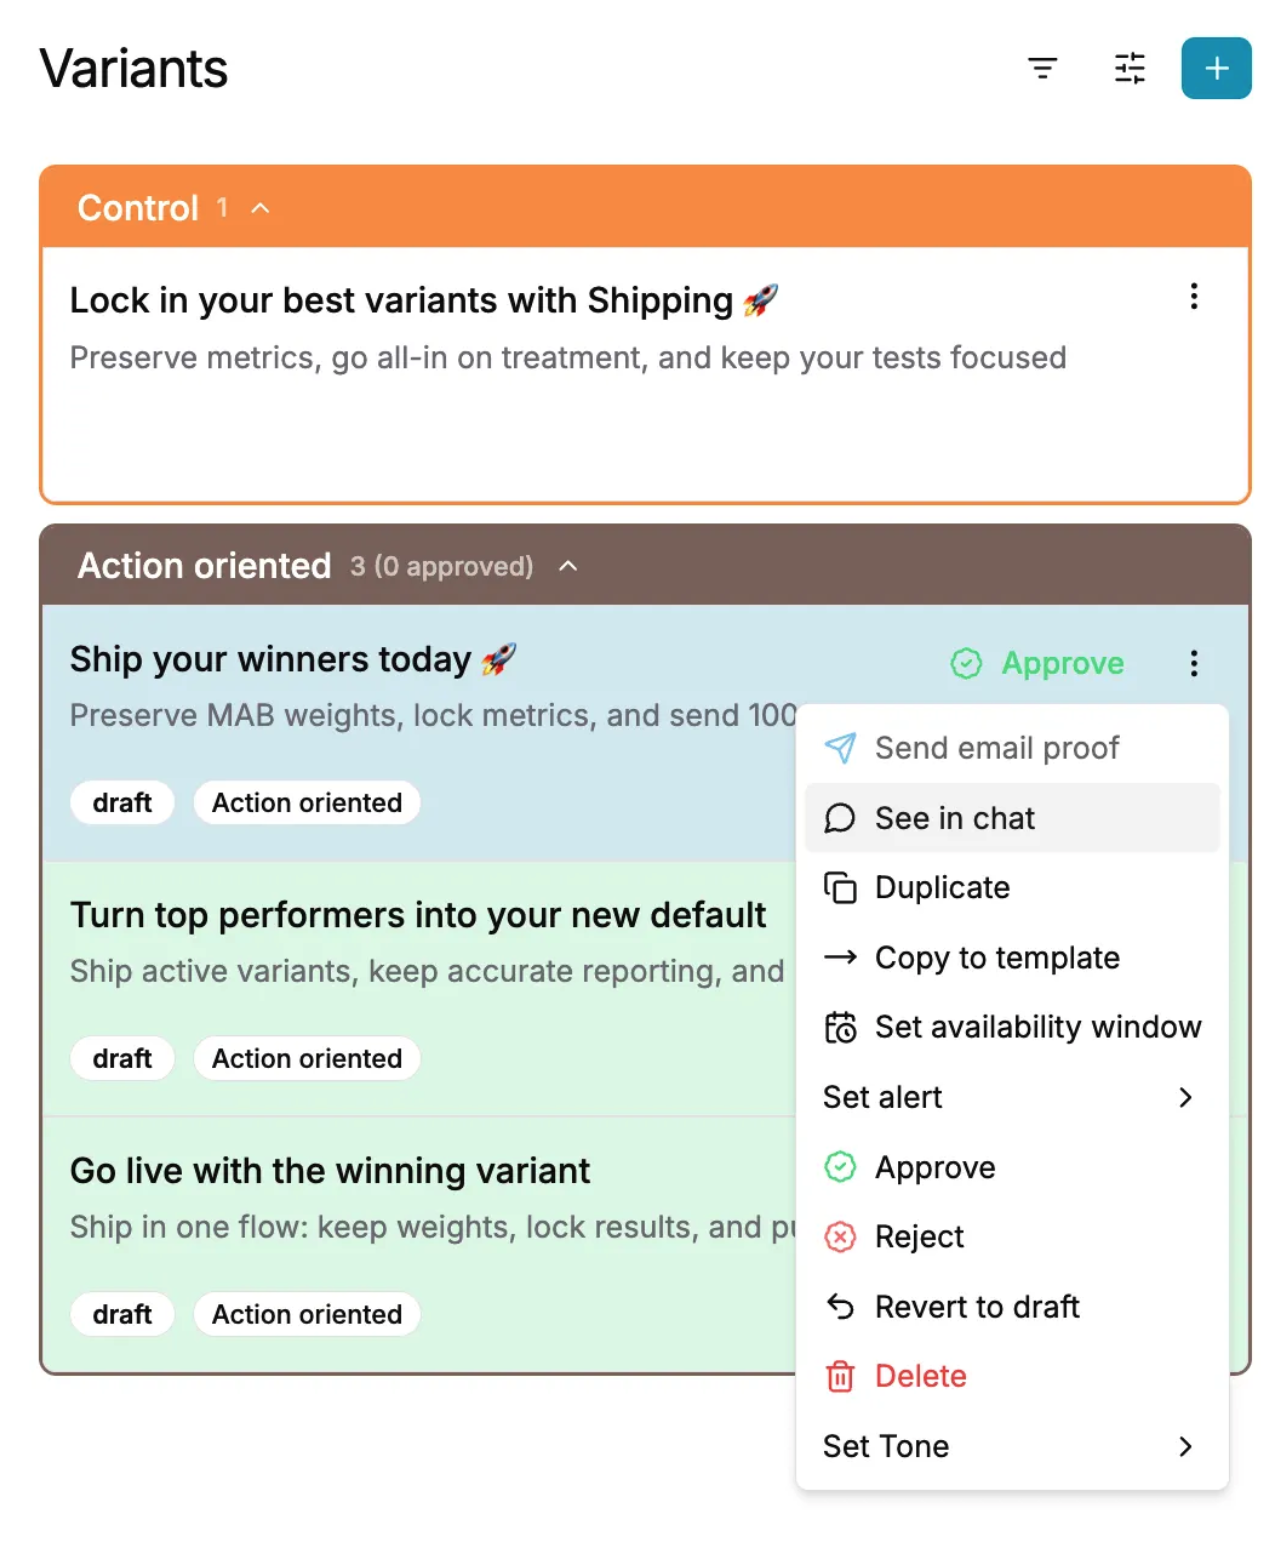
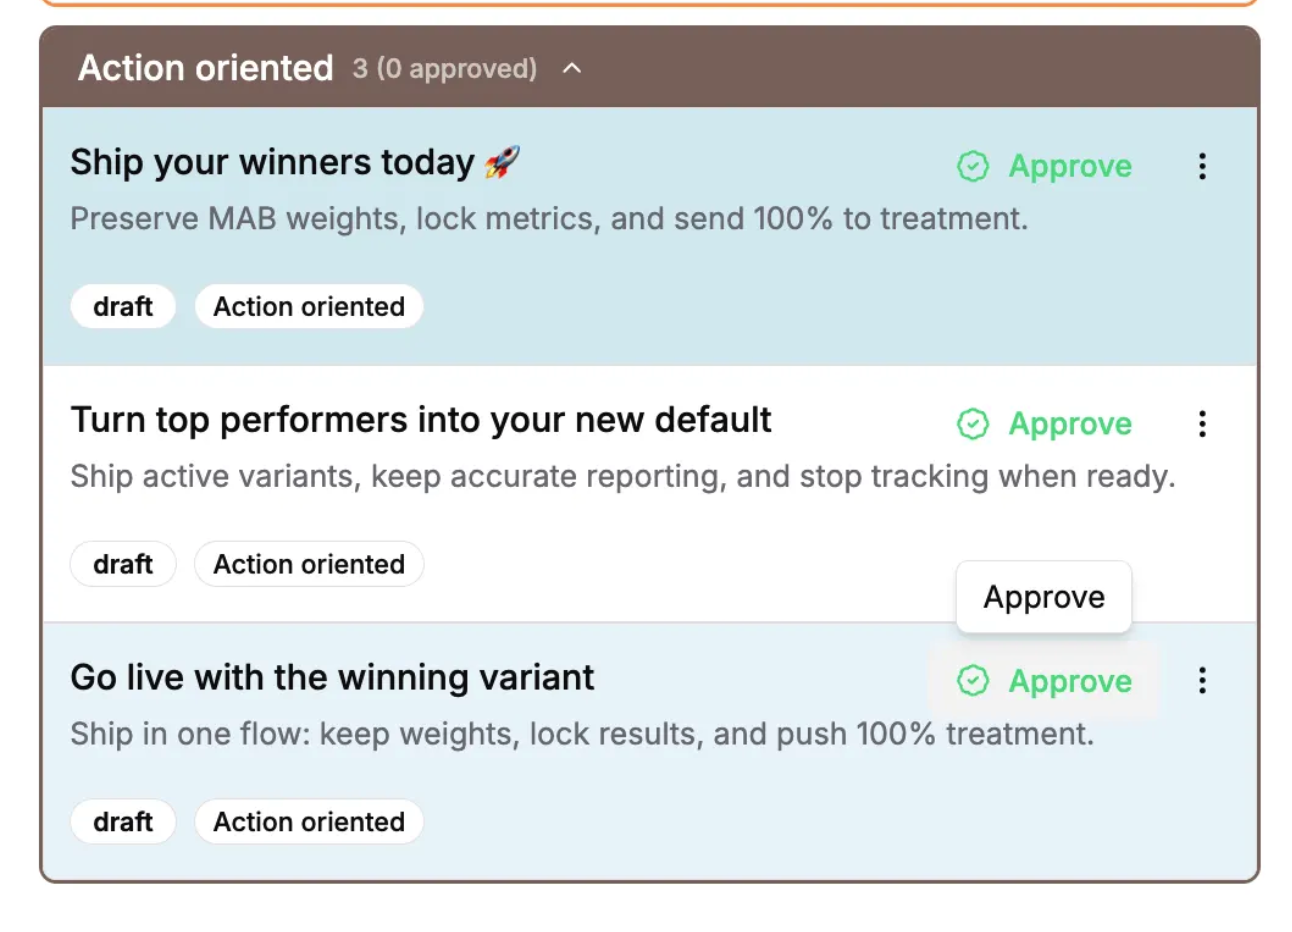
6) Approving and saving variants
Section titled “6) Approving and saving variants”When a variant is ready to use, approve it to make it eligible for experimentation.
- Each variant includes a green “Approve” button.
- Click Approve to approve an individual variant.
- To bulk approve, hold Shift, select multiple variants, and click Approve.
Once saved, your approved variants are ready to be used in experiments, and you’re all set! 🎉