Setup Guide
Templates allow you to run and track experiments for a touchpoint in your marketing lifecycle.
Before You Start
Section titled “Before You Start”- Confirm that you’ve set up integrations for your ESP(s). These are needed for templates to function properly.
1) Creating a New Template
Section titled “1) Creating a New Template”Follow the steps below to create and properly hook up a new template to a touchpoint in your ESP.
Select a Touchpoint
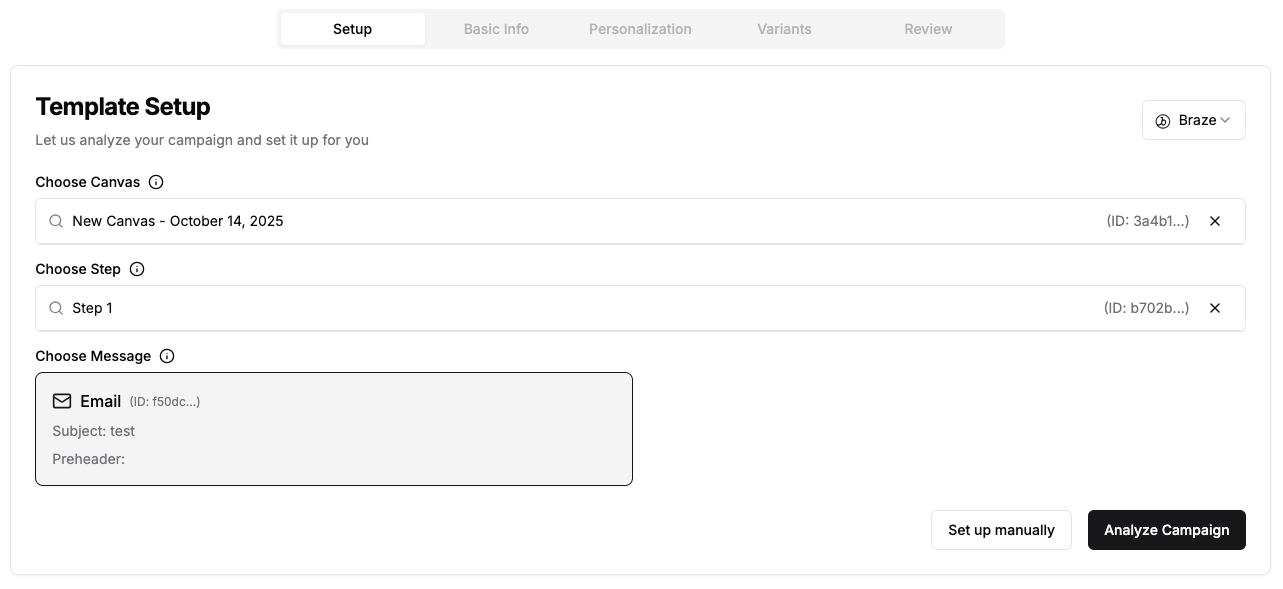
Section titled “Select a Touchpoint”From the Home or Templates page, click the + New Template button, or navigate here.
- Select the ESP with which you’re integrating this template from the dropdown in the upper right corner.
- In the
Choose Canvasfield, start typing the name or ID of the ESP touchpoint for which you want to create a JustAI experiment (template).- Depending on the ESP, you may need to select further targeting details (e.g. message) - the UI will guide you.
- Once happy with your targeted touchpoint, hit
Analyze Campaign.
Basic Info
Section titled “Basic Info”JustAI will scan your touchpoint and prefill data based on its properties. We recommend that you review this information and add your own additions to fill in context where it is missing.
- Name: usually helpful to keep it the same name as your ESP touchpoint, but this can be anything you want.
- Description: the AI uses this description to understand the purpose and goals of this experiment. Be as descriptive as possible.
- Brand and Tone: the AI uses this information to understand the brand and tone of the email (in conjuction with your org-level settings).
- Key Metric: the most important metric to evaluate the success of the campaign. You can configure metrics for your org here.
Once ready, hit the Next button.
Personalization
Section titled “Personalization”Next, you’ll configure the variables and attributes that will affect what content is personalized and served to users who hit your touchpoint.
- Variables: the touchpoint-specific rendering values that will be personalized for each user in your touchpoint. They can be referenced in the template using the
{{ variable }}Handlebars syntax. These are prepopulated based upon your touchpoint’s target channel, but you can modify these to whatever variables your ESP touchpoint uses to display content. - Fields: these are templated variables (e.g.
{{ firstName }}) that can be used in the actual text of a copy or template variable. - Attributes: define how you want to segment your variants for this template. You can configure attributes for your org here.
- Themes: add optional theme tags for a template. Selecting an org default prepopulates the name and suggested values, but you can still customize them or create your own themes unique to this template. You can configure themes for your org here.
Example
Section titled “Example”Say that you have an email touchpoint for newly joined users. You want to experiment with the subject, preheader, and body of the email. In the body, you want to address the user by their first name. You want to generate variants (target users) based on the subscription tier they belong to. You want to mark variants based on messaging tone: urgent, calm, or persuasive.
In this case, you’d have:
- Variables: subject, preheader, body
- Fields: firstName
- Attributes: subscriptionTier
- Themes: urgent, calm, persuasive
Variants
Section titled “Variants”Based on the variables you selected in the previous step, you’ll define your base “control” variant. If a user does not qualify for other variants you create later (or falls into a control experiementation bucket), this is the copy they will be served. Typically, the values to assign each variable here will match the values in the touchpoint currently set up in your ESP.
Review
Section titled “Review”Double-check your setup. Once ready, click Save Template to create the template.
2) Experimentation Setup
Section titled “2) Experimentation Setup”Once you’ve created your template, there are some additional steps needed to set up the experiment. Start by navigating to the Configure → Integration tab for your template.
A/B Test Configuration
Section titled “A/B Test Configuration”This configures how traffic splitting behaves for the template.
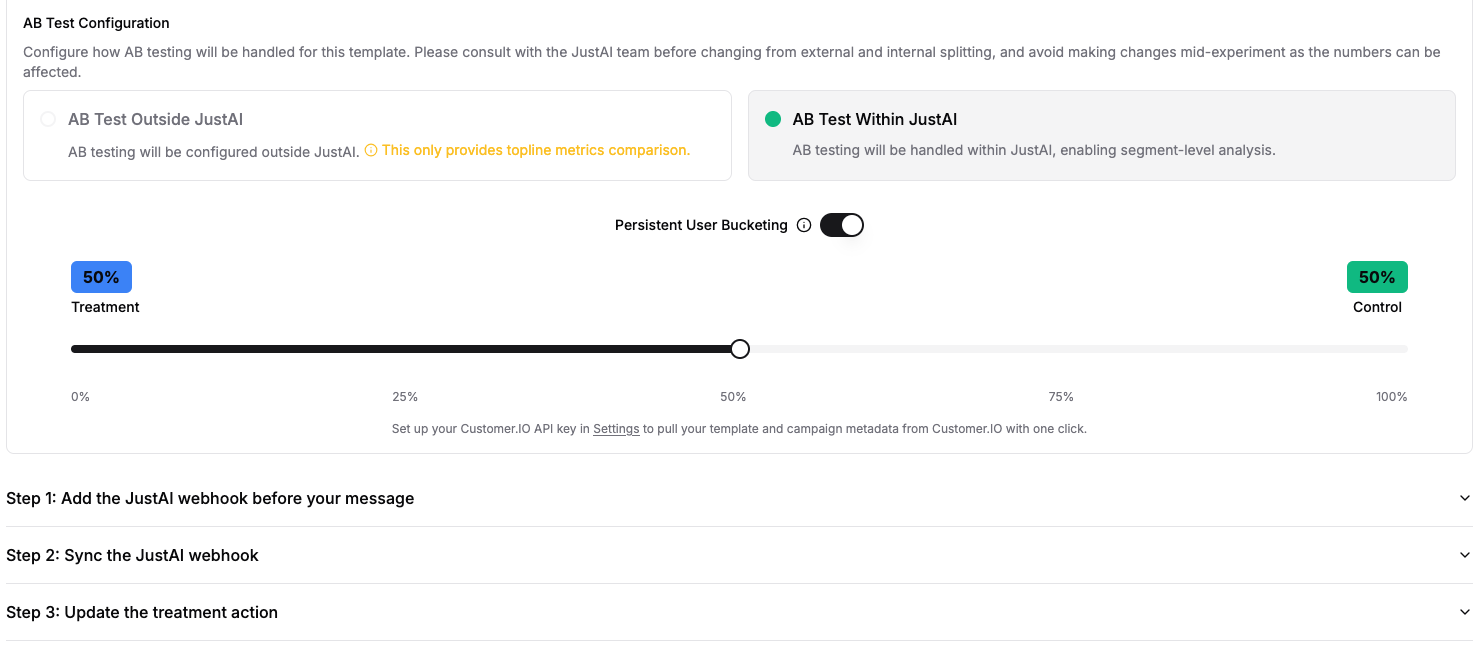
A) Internal Experimentation (Recommended)
Section titled “A) Internal Experimentation (Recommended)”We highly recommend performing experiment splits within JustAI. This approach will give your template comprehensive metrics comparison, enable continuous experimentaiton (holdout), and keeps your ESP flow simpler.
It’s also recommended to enable Persistent User Bucketing, to ensure users always fall into the same bucket based on their user ID. Finally, follow the inline steps for your ESP (below the toggle).
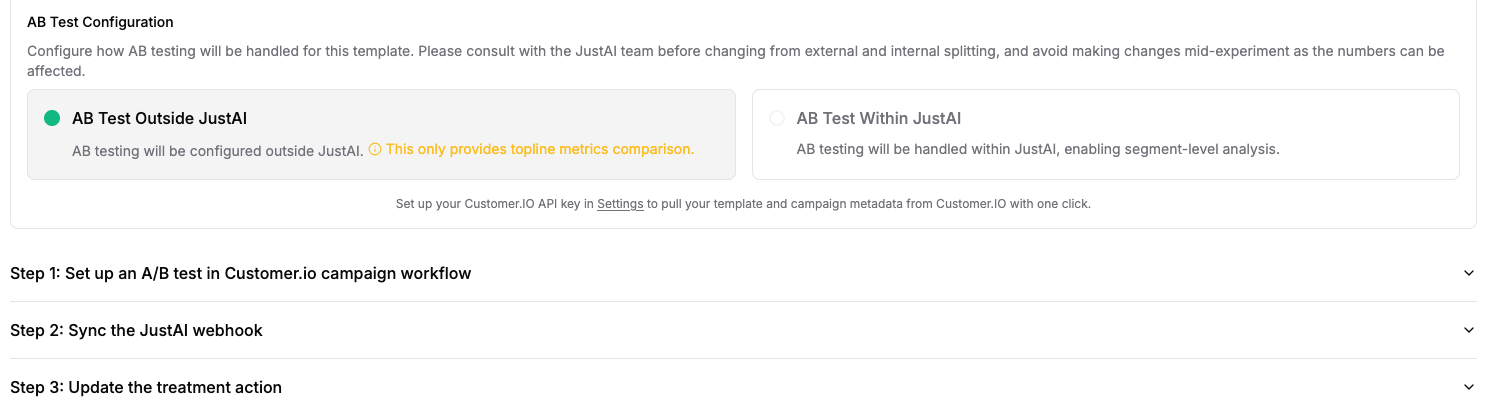
B) External Experimentation (Legacy)
Section titled “B) External Experimentation (Legacy)”Only select this option if you have a technical reason to. New templates should avoid this option, if possible. Once you’ve selected this option, there’s work needed in your ESP, follow the inline steps for your ESP (below the toggle).