
Milestones & Shipping
Run experiments, ship winners, and optimize continuously over time.
Prerequisites
Section titled “Prerequisites”- Your template must be set up for AB testing within JustAI.
- Caveat: this means you can’t double track/reconcile results on your native experience platform; JustAI will track results across users and touchpoints for you.
- Your template must have Persistent User Bucketing enabled.

Step 1: Run an experiment as usual
Section titled “Step 1: Run an experiment as usual”- You create and launch an experiment on a message.
- The experiment runs with a control and one or more variants.
- Results accumulate until the system can confidently identify a winning configuration.
At this stage, nothing is different from how experiments worked before.
Step 2: Choose variants to ship
Section titled “Step 2: Choose variants to ship”Option 1: The system detects a winner
Section titled “Option 1: The system detects a winner”As the experiment runs:
- Performance is evaluated against your selected metric(s).
- Once a variant clearly outperforms the others, the experiment becomes shippable.
At this point, the Ship option will be available in Compact Mode in Studio.
Identify the winning variant in Compact Mode
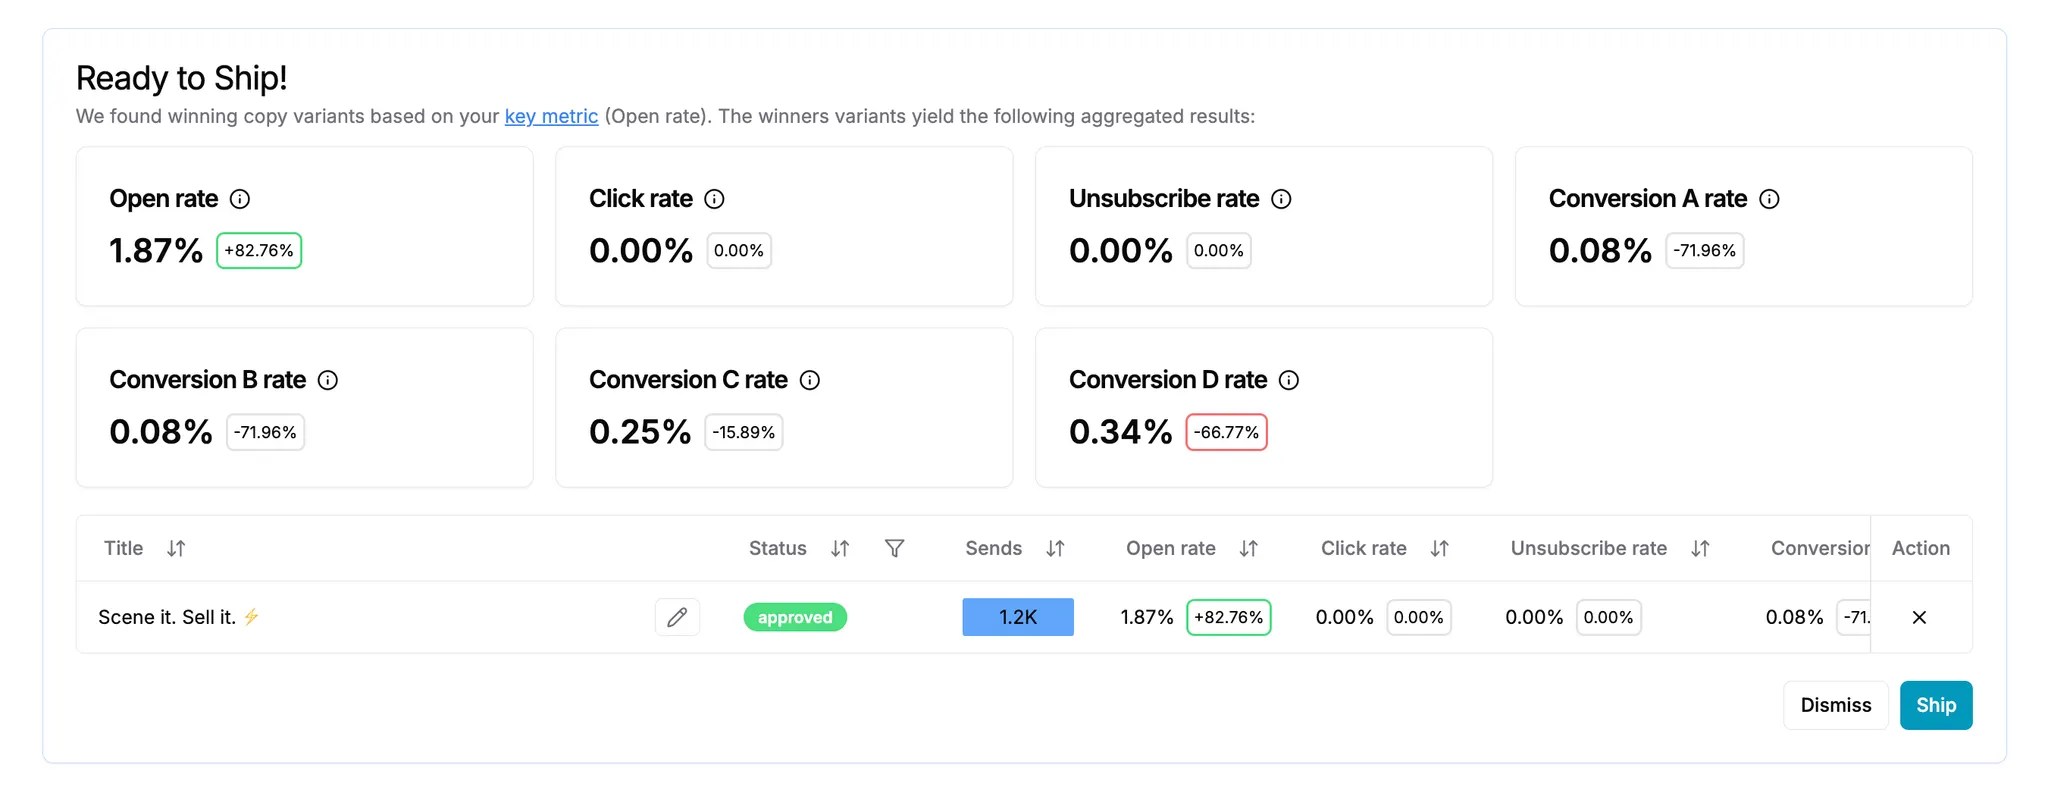
Section titled “Identify the winning variant in Compact Mode”Once your experiment has enough data, the system will surface when a variant is ready to ship.
- Navigate to the experiment results and switch to Compact Mode.
- Compact Mode gives you a summarized view of variant performance and shipping actions.
- Look for the variant marked as Ready to Ship.
- This indicates the variant is:
- Statistically significant.
- Winning on your selected key metric (e.g. conversion rate, click rate).
- This indicates the variant is:
- Review the aggregated results at the top of the page.
- These results show how the winning variant compares across key metrics and confirm why it’s eligible to ship.
- Select the winning variant.
- Once selected, the Ship action becomes available; click it.
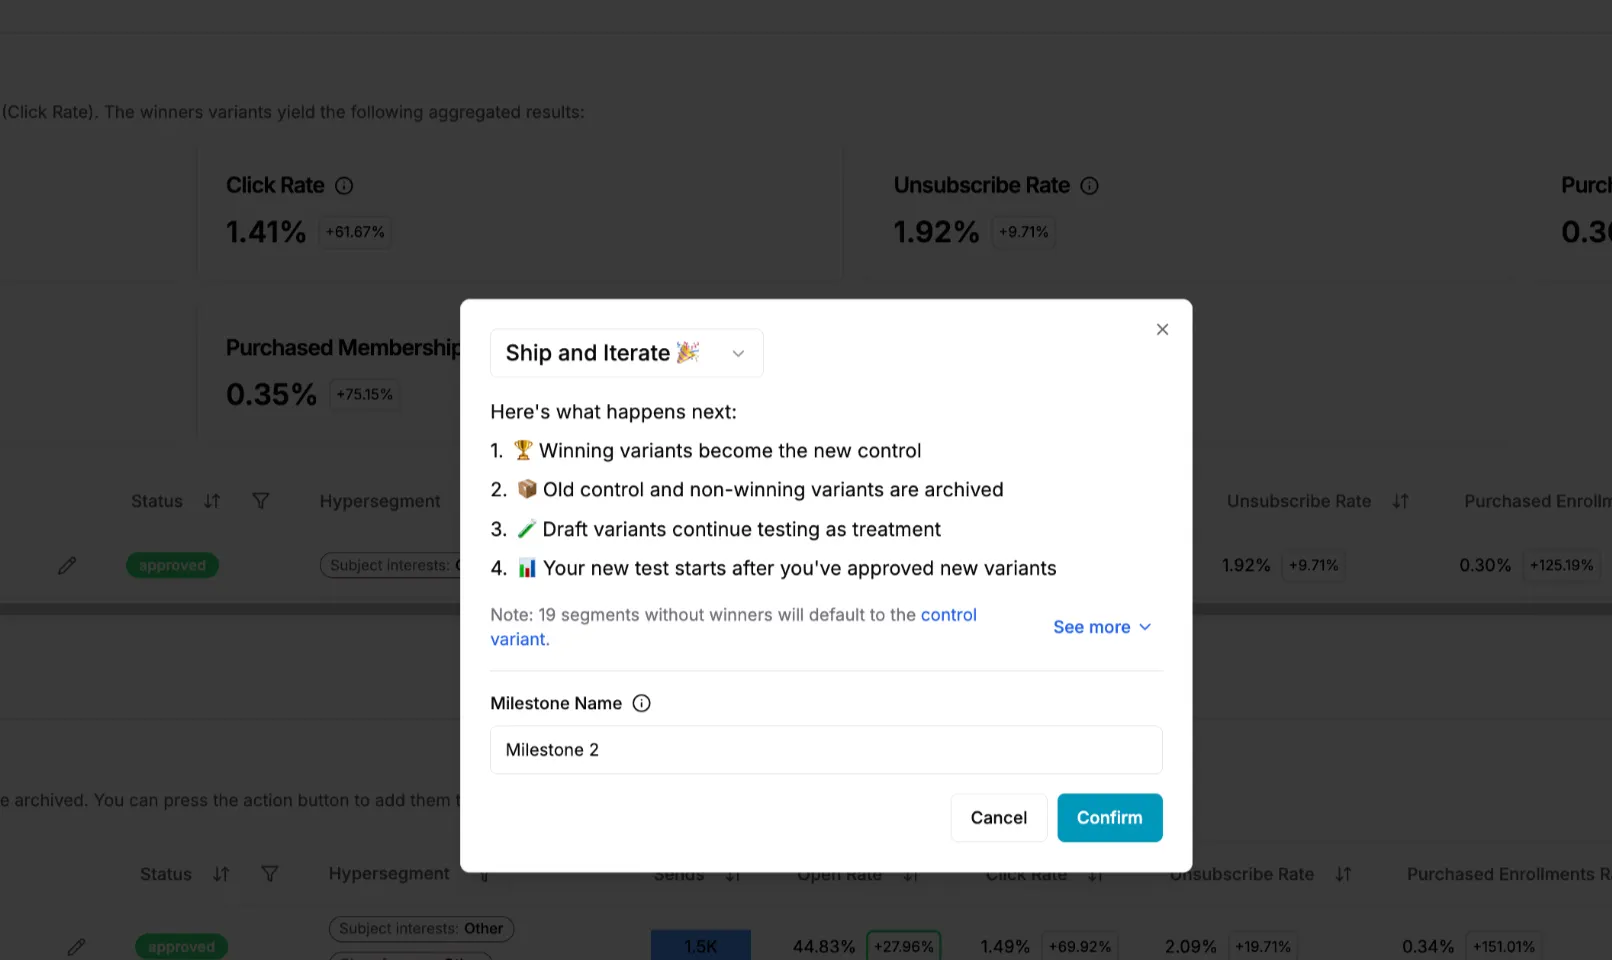
- Select “Ship & Iterate” from the dropdown at the top of the modal (NOT “Ship & Lock”)
At this point, you’ve confirmed which variant should be promoted and are ready to lock in the win and iterate.
Option 2: Select winners manually
Section titled “Option 2: Select winners manually”At any point during the experiment, you can manually elect variants to ship if you choose.
Manually shipping variants
Section titled “Manually shipping variants”In Preview Mode in Studio, you may right click the elipses on any variant(s) and select “Ship variant.”
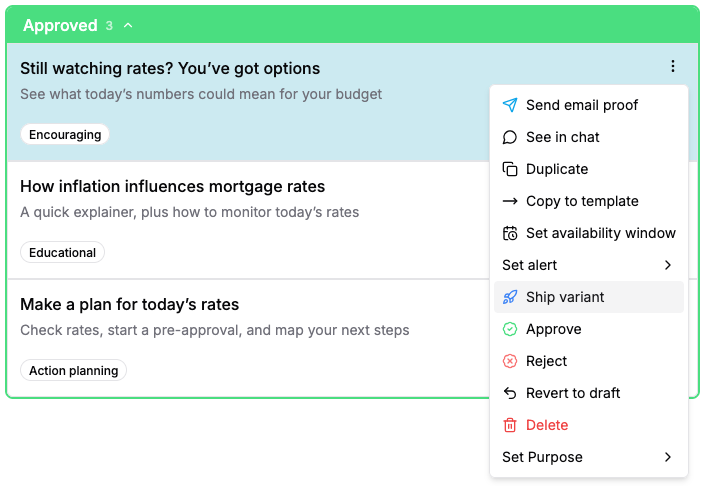
This will take you to the same Compact Mode in Studio page with those variants selected for shipping (and you may select any more that you wish to ship).
- Once happy with the variants selected, hit the “Ship” button.
- Select “Ship & Iterate” from the dropdown at the top of the modal (NOT “Ship & Lock”).
At this point, you’ve confirmed which variant should be promoted and are ready to lock in the win and iterate.
Step 3: The winner becomes the new control
Section titled “Step 3: The winner becomes the new control”Immediately after shipping and iterating:
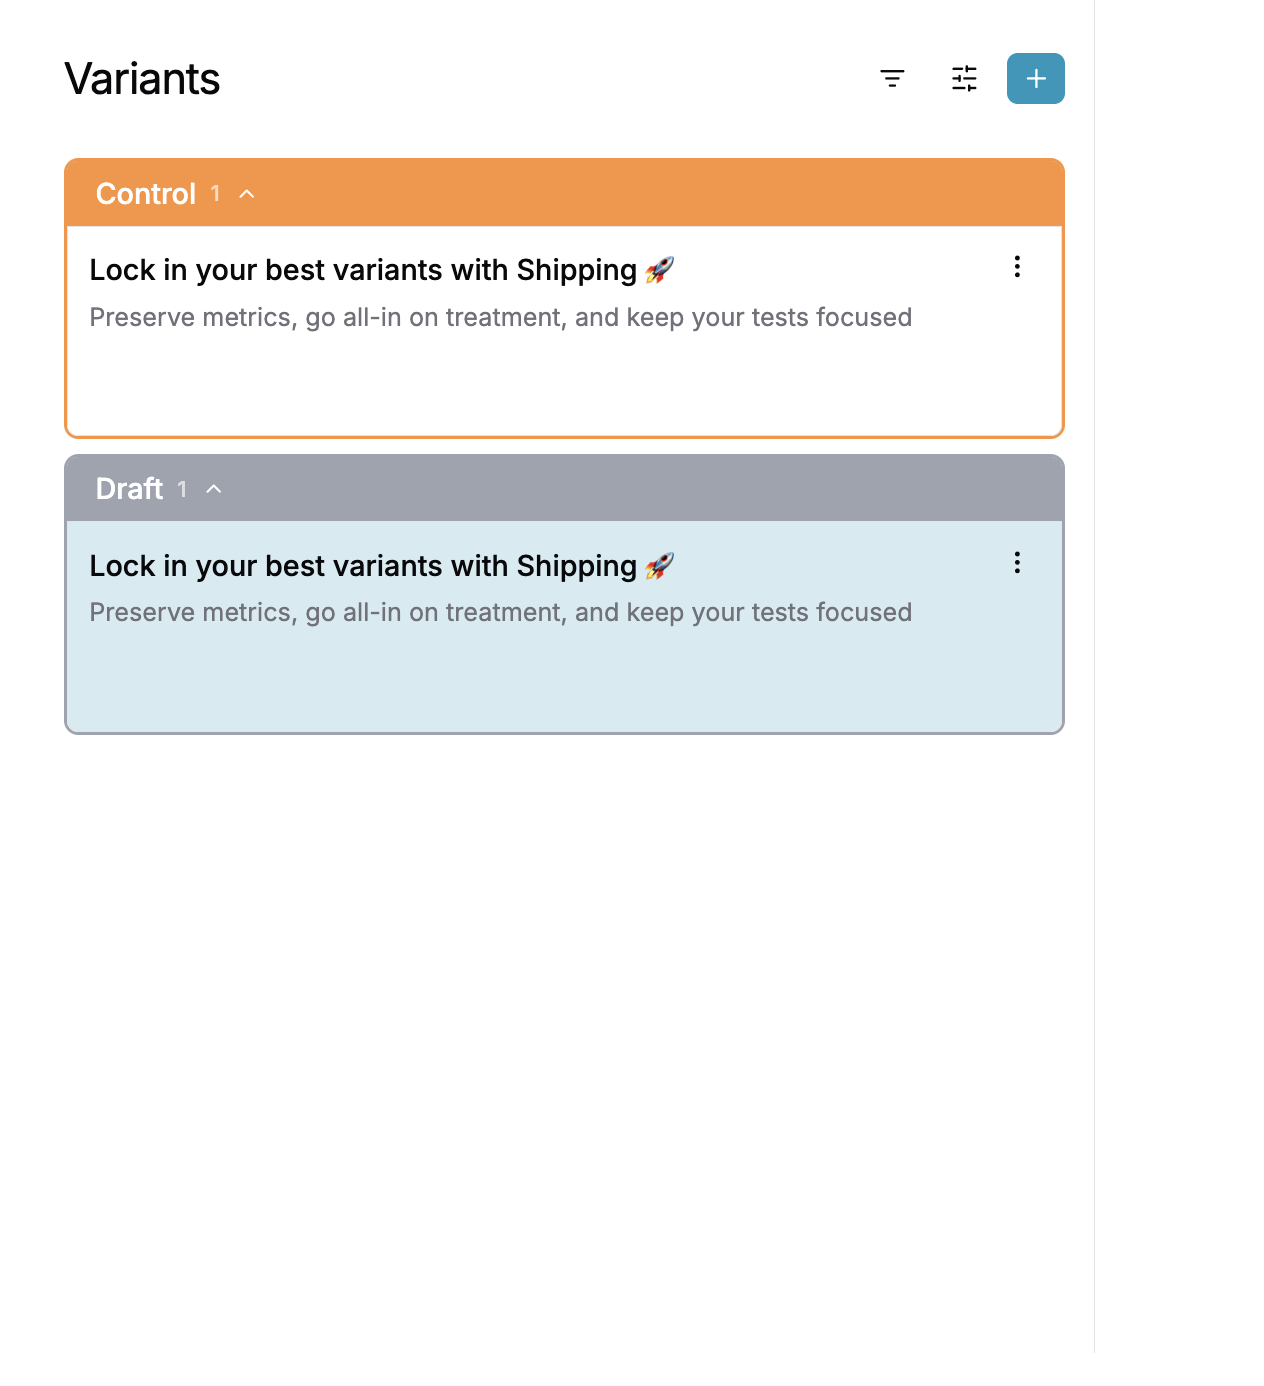
- A new experiment setup is created for you.
- The previously winning variant is now set as the control.
- You can now add new variants to test against this improved baseline.
Importantly:
- You do not start from scratch conceptually.
- You are building directly on top of your last win.
This is the start of the next Milestone.
Step 4: Launch the next Milestone experiment
Section titled “Step 4: Launch the next Milestone experiment”- Add new variants based on what you learned from the previous test.
- Confirm audience, traffic split, and metrics.
- Launch the new experiment.
From a UI perspective, this looks like a new experiment.
From a Milestones perspective, it is the next step in a continuous optimization chain.
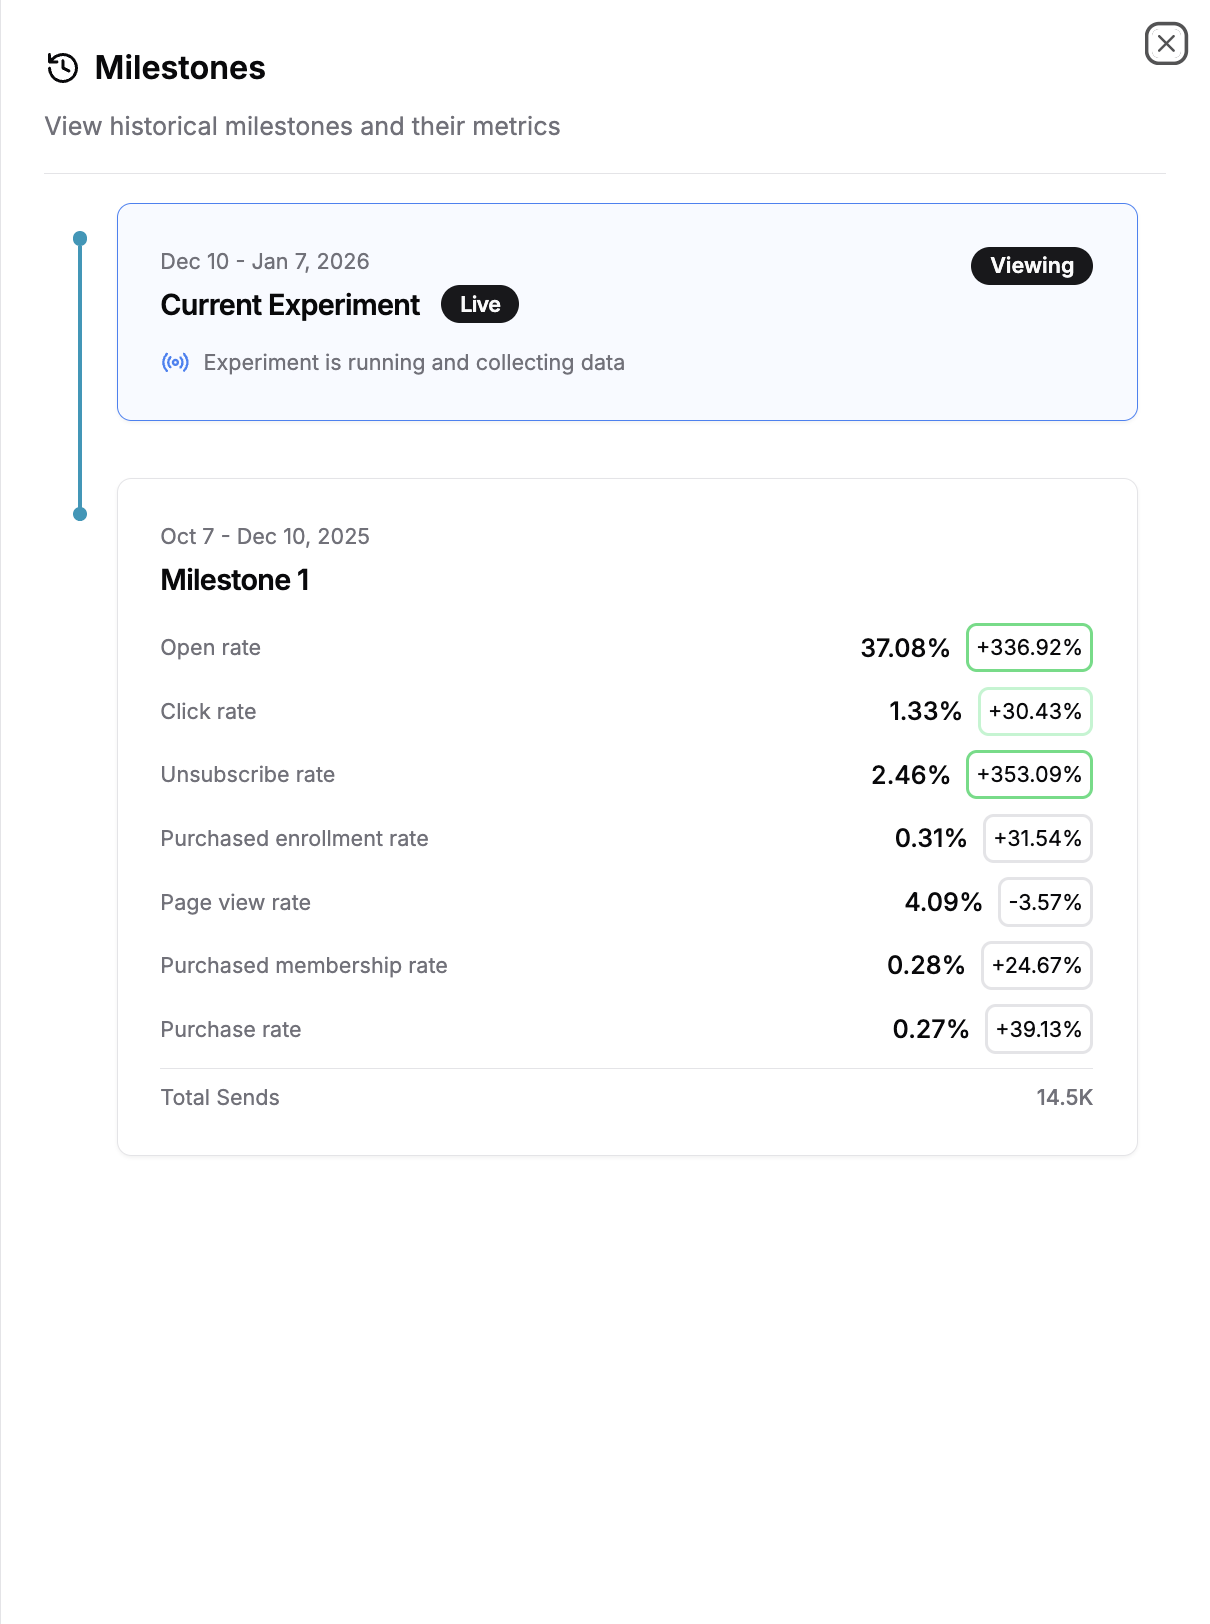
Step 5: View Milestones over time
Section titled “Step 5: View Milestones over time”As you repeat this process, Milestones builds a timeline of your optimization efforts.
In the Milestones view, you can see:
- Each shipped Milestone in chronological order.
- The metrics associated with each shipped win.
- What was tested and what worked in the past.
- The current active experiment at the end of the chain.
This creates a clear narrative of how the campaign has evolved.
You’ve now completed a Milestone!
By shipping a winning variant and turning it into the new control, you’ve locked in a proven improvement while automatically setting yourself up for the next experiment. Each Milestone builds on the last, giving you a continuous, always-on optimization loop without losing historical context.
Run experiments and permanently serve the winners without further optimization.
Step 1: Run an experiment as usual
Section titled “Step 1: Run an experiment as usual”- You create and launch an experiment on a message.
- The experiment runs with a control and one or more variants.
- Results accumulate until the system can confidently identify a winning configuration.
At this stage, nothing is different from how experiments worked before.
Step 2: Choose variants to ship
Section titled “Step 2: Choose variants to ship”Option 1: The system detects a winner
Section titled “Option 1: The system detects a winner”As the experiment runs:
- Performance is evaluated against your selected metric(s).
- Once a variant clearly outperforms the others, the experiment becomes shippable.
At this point, the Ship option will be available in Compact Mode in Studio.
Identify the winning variant in Compact Mode
Section titled “Identify the winning variant in Compact Mode”Once your experiment has enough data, the system will surface when a variant is ready to ship.
- Navigate to the experiment results and switch to Compact Mode.
- Compact Mode gives you a summarized view of variant performance and shipping actions.
- Look for the variant marked as Ready to Ship.
- This indicates the variant is:
- Statistically significant.
- Winning on your selected key metric (e.g. conversion rate, click rate).
- This indicates the variant is:
- Review the aggregated results at the top of the page.
- These results show how the winning variant compares across key metrics and confirm why it’s eligible to ship.
- Select the winning variant.
- Once selected, the Ship action becomes available; click it.
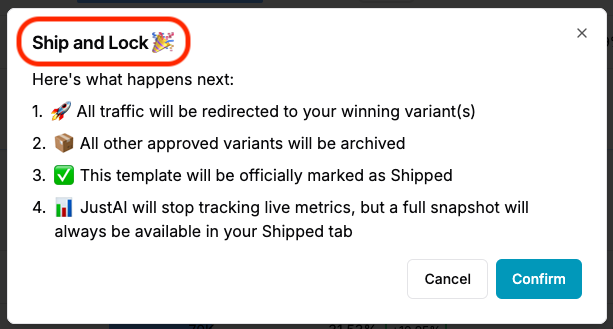
- Select “Ship & Lock” from the dropdown at the top of the modal (NOT “Ship & Iterate”)
At this point, you’ve confirmed which variant should be promoted and are ready to lock in the win and iterate.
Option 2: Select winners manually
Section titled “Option 2: Select winners manually”At any point during the experiment, you can manually elect variants to ship if you choose.
Manually shipping variants
Section titled “Manually shipping variants”In Preview Mode in Studio, you may right click the elipses on any variant(s) and select “Ship variant.”
This will take you to the same Compact Mode in Studio page with those variants selected for shipping (and you may select any more that you wish to ship).
- Once happy with the variants selected, hit the “Ship” button.
- Select “Ship & Lock” from the dropdown at the top of the modal (NOT “Ship & Iterate”).
At this point, you’ve confirmed which variant should be promoted and are ready to lock in the win and iterate.
Step 3: The winner is served future traffic
Section titled “Step 3: The winner is served future traffic”Immediately after shipping and locking:
- All traffic will redirected to your winning variant(s).
- All other variants will be archived.
- The template will be marked as Shipped.
- JustAI will stop tracking live metrics, but a full snapshot will always be available in the Shipped tab.